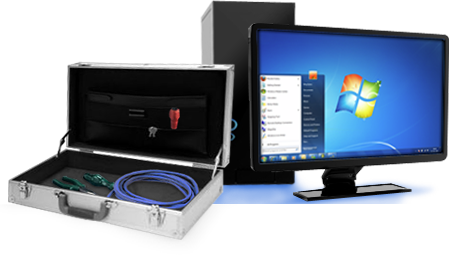
Computer Physicians Computer Repair Data Recovery in Longmont Boulder Erie Denver Colorado Networking PC services help virus removal training

Maximizing Your Technology with Computer Physicians, LLC in Longmont, CO

As a business owner or individual in Longmont, Colorado, you rely on technology to help you stay productive and competitive. But when your computer or network experiences problems, it can quickly bring your operations to a halt. That’s where Computer Physicians, LLC comes in.

Computer Physicians, LLC is a leading IT computer repair and web design company in Longmont that offers a wide range of technology services to help you get back up and running as quickly as possible. Steve is an experienced professional dedicated to helping you maximize your technology investments and achieve your business goals.

We offer comprehensive computer repair services to help you resolve any technical issues you may be facing, whether it’s a simple software problem or a more complex hardware issue. We also offer web design services to help you create a professional and user-friendly online presence for your business. And, with our data recovery services, you can rest assured that your important files and information are safe and secure, even in the event of a disaster.

At Computer Physicians, LLC, we understand that technology can be complex and confusing, which is why we strive to provide clear and straightforward solutions. Steve is always available to answer your questions and help you understand your technology options, so you can make informed decisions.

We are committed to delivering high-quality services at an affordable price, and we always go the extra mile to ensure that our clients are completely satisfied with their experience. Whether you need help with computer repair, web design, or data recovery, we have the expertise and resources to get the job done.

So, if you’re looking for a trusted partner to help you maximize your technology investments in Longmont, look no further than Computer Physicians, LLC. Contact us today to schedule a consultation and find out how we can help you achieve your business goals.

Computer IT support (Information technology) Computer Physicians, LLC Longmont/Boulder CO

Computer Physicians Provides IT support for PC computer maintenance and to make sure your systems are running smoothly in the Longmont, Boulder and Denver areas of Colorado and we can also provide REMOTE support through the internet.

Computer Physicians, LLC provides:

  • Onsite, in-shop, and remote PC troubleshooting, repair and customization
  • IT Support, Network setup, maintenance, troubleshooting
  • Data Recovery
  • Internet setup, troubleshooting, repair
  • Virus, spyware, malware, and adware removal
  • Hardware and software repair
  • Smartphone help, setup, and training
  • Website design, hosting
  • Computer Sales – new and used systems available
  • Computer peripherals, parts and accessories for sale
  • Upgrades & Installations
  • Building customized PC computer systems
  • Tutoring & Training
  • Computer and network security
  • Working with all versions of Microsoft O.S. From DOS to Windows 10, Server 2012.
  • Troubleshooting, maintaining, customizing application programs such as MSOFFICE, ACCESS, EXCEL, WORD, QuickBooks, email programs, Outlook, Outlook express, etc.
  • Troubleshooting and maintaining networks-wireless, wired, router setup, switches, cable modems, CAT 5e cable installations.
  • Email, internet problem solving and customization
  • Networking – managing users, groups, sharing, permissions, printers and troubleshooting the network. stand alone PC’s as well as workstations.
  • Computer Physicians provides remote computer help.  Just give us a call or text or email us and we will arrange a time to help you with your computer issues remotely through the internet.   By using your internet connection we can access your computer temporarily to fix your computer problems.  We use a secure connection and once we log off the session is ended and would need a new password to reconnect again.We have found that by using remote access and with you on the other end to deal with moving of equipment or pressing buttons that many problems can be resolved. Many times we can help you the same time you call.

We provide on-site, in-shop, and remote computer service.  In many cases, we can repair your computer the the day you call us. We also provide remote computer help through the internet or we can come to you so you never have to leave your office. For a reduced rate and quick turn-over time you can visit us at our workshop in Longmont close to 19th and Main. This is about 7 miles from downtown Boulder  Colorado. You will need to call us first to let us know what time you will be coming to drop it off, and to get directions. By appointment only. Servicing Boulder, Longmont, Erie, Denver and the Colorado Front Range and worldwide via remote access.

Call us for information on pricing or to schedule an appointment.

Longmont Computer Physicians – User Accounts in Microsoft Windows

Longmont Computer Physicians learning teaching series. Computer Physicians of Longmont, Colorado will post an explanation of User Accounts in Microsoft Windows 10.

One thing you will definitely need to have to use a Windows computer is a user account. User accounts are required to make sure people are allowed to access the computer only if the owner wants them to. In order to use a Windows computer, you will need a user account that has been configured for you by an administrator or when you first set up your new computer. There are many reasons why Windows has user accounts, including the following: Having a way to protect their personal files from being accessed from others (unless they want them to be accessed);  Providing a way to assign permissions to shared files and folders on the local computer or network;  Determining what type of functions that person is allowed to perform on the computer itself;  Tracking things such as login times, failed login attempts, and file access using event logging;  Setting allowed times for users to be able to log onto a computer or network;  Saving the personal settings of your computer, such as your desktop background and installed printers etc.;  Assigning levels of access for software usage.  Keep in mind as a home user you won’t have to worry about most of these because your user account will mainly be used to save personalization settings that you customized for your user account and to keep your documents from being accessed by other users. As usual, Microsoft has given us a couple of ways to work with user accounts, and each way works a little differently, but we will get to that later on in this chapter. User Account Types There is more than one type of account for a Windows user, and this makes sense because different people need different levels of access and permissions. The two main types of user accounts that you will be dealing with are the standard user and the administrator.

Standard user accounts are for people who need to do everyday tasks on the computer such as run programs, go online, print, and so on. Standard users can also install and uninstall certain software as well. It’s usually a good idea to make everyone on your computer a standard user, and then if they need something done that requires higher privileges, they can have an administrator do it. And by administrator, I mean you! Administrator user accounts have full control over the computer and can do things such as install or uninstall any software, add or remove user accounts, add or remove hardware, and make changes that affect Windows itself. If you are logged in as a standard user and need to do something that requires administrator access, many times you will get prompted to enter the username and password of an administrator so you don’t need to actually log out and then back in as an administrator to get the job done.

Creating User Accounts With social media being all the rage and everyone and everything being connected to each other, Microsoft decided that it wanted to use what they call a Microsoft account to log into your computer with. This way whenever you log into another device with the same account, it will use many of the same settings for a universal experience each time. A Microsoft account uses an email address to login rather than a standard username. But if you are the type that likes to keep things old school (and simple), then you can still use a standard user type to log in with. Even if your computer was initially configured with a Microsoft account, you can convert it to a standard account pretty easily. I find that local accounts are much easier to troubleshoot when it comes to login problems. To view the user accounts on your computer, go to the Windows 10 Settings and click on Accounts and then on Family & other users. From this screen you will see your account and any other accounts configured on the computer.

Longmont Computer Physicians learning teaching series. Computer Physicians of Longmont, Colorado will post an explanation of User Accounts in Microsoft Windows 10.

How to use the IF function with relational operators with Excel in Microsoft and Office 365

As part of our series of helping customers with their small business needs Longmont Computer Physicians, LLC is offering these free classes on how to use different software programs. Here is our instructional video on using Microsoft Excel spreadsheets.

Microsoft 365 Beginner class – Excel
Microsoft 365 Intermediate class – Excel
Microsoft 365 Advanced class – Excel


The IF function in Excel is one of its logical functions, which evaluate to either a “TRUE” or “FALSE” value. The IF function in Excel lets you perform a logical test on a cell’s value and then return a result based on whether or not the cell’s value passes or fails the test. The IF function is similar to an “If…then…else” coding statement. You must know at least three different arguments to write a logical function. The first argument is the “logical test” to apply to the cell. The second is the cell value or formula to return if the test returns a “TRUE” value or “passes” the logical test. The third is the cell value or formula to return if the test returns a “FALSE” value or “fails” the logical test. The syntax of the IF function is: =IF(logical_test,true_response,false_response) If you want the formula to display a text value for the true response or false response, then you must place the text value inside double quotation marks (“ ”). If you want the function to display a date, it must be enclosed within pound signs (##). The only time you wouldn’t mark the data type of the value to return is if you want the function to display a numerical result or calculate a formula. Often, you may want to know if a cell passes or fails multiple logical tests.

One way to apply multiple logical tests to a cell is to use nested logical functions. A “nested” logical function in Excel is one that places the cell through a second logical test if it “fails” the first. These functions are useful for determining the value of a cell by placing it through several different tests, displaying different results based on which test it passes. You can nest up to 127 additional IF statements behind your original, if needed. The syntax for these are: =IF(logical_test _1,true_response,IF(logical_test_2,true_response,false_response)) You must remember to close all open parentheses for every IF statement you nest within the logical function at the end of the formula. In this case since there are two IF statements, there are two closing parentheses at the end of the formula. Alternatively, if using Excel 2019 or later or using Excel as part of Office 365, you can use the new IFS function to pass a cell though multiple logical tests and return a value for the test it passes. The IFS function replicates the features provided by nested IF functions, but uses a simpler, streamlined syntax. We’ll examine the IFS function in a later lesson.

In addition, you may also want to know if a cell meets multiple criteria at the same time. You can use the AND and OR functions to find this out. The AND function returns a “TRUE” value if the evaluated cell passes all the logical tests listed after the AND function. The OR function returns a true value if the evaluated cell passes any of the logical tests that follow the OR function. Note that you can evaluate up to 255 different logical tests after the AND and OR statements. When you look at how you can combine these tests with the IF function or nested IF functions, you can see how you can start to become a very powerful formula creator. Combining these Excel functions lets you place cells through a battery of tests, and then decide what function to perform or value to display, based on the results from the tests. The general syntax when combining the IF function with the AND and OR functions is as follows: =IF(AND(logical_test_1,logical_test_2,logical_test_3,etc.),true_response,false_response) =IF(OR(logical_test_1,logical_test_2,logical_test_3,etc.),true_response,false_response) The IFS function is only available in Excel 2019 or later or Excel as part of an Office 365 subscription. The IFS function in Excel lets you pass a cell through a series of logical tests and then return a value based on which logical test the cell passes. This provides a very similar functionality to using multiple, nested IF statements. When using Microsoft Office Excel 365.

How to Create and Use Tables with Excel in Microsoft 365 and Office 365

As part of our series of helping customers with their small business needs Longmont Computer Physicians, LLC is offering these free classes on how to use different software programs. Here is our instructional video on using Microsoft Excel spreadsheets. 

Microsoft 365 Beginner class – Excel
Microsoft 365 Intermediate class – Excel
Microsoft 365 Advanced class – Excel

Excel can store information in tables. An Excel table is information saved in a table format and explicitly defined as a table in Excel. When you store information in a table format, you place the different types of information to collect in columns, called “fields” in database terminology. Each “field” contains a separate type of information. Examples could be: “First Name,” “Last Name,” “Title,” “Address,” “City,” “State,” and so on. Each row in the table is called a “record.” A record is a single entry in which you record each type of field information about a single instance of the subject of your table. For example, within a “Customers” table that contains the fields in the previous example, a record in that table might contain the information: “John,” “Doe,” “Mr.,” “111 Nowhere Ln.,” “Anytown,” “MI.” When entering data into a table, avoid creating entirely blank columns or rows! Having entirely blank columns and rows in a table can often lead to problems with sorting and filtering table data. Before you create a table in Excel, consider the information you must collect. Sometimes, it is easier to think of the fields to create after thinking of the subject of the table, first. For example, to create a table to record customer data, you must think about what information you want to collect about your customers.

The types of information you decide to track become the “fields,” or columns, in your table. For the purpose of the example, assume you decided to record your customer’s name, address, city, state, and zip code. When thinking of the table’s field structure, you need to consider how detailed to be with the customer’s information. Poor decisions in the planning phase can be problematic later. For example, do you want to record the customer’s name in one field or more than one field? If you ever want to sort the database by the last name of the customer, you will probably want to store the customer’s name in at least two fields: “firstname” and “lastname.” Noting little things like this during the creation process can save time in editing the table structure later on, after it becomes a problem. After deciding what information to record in which field, enter the titles of these fields as the top row of the table.

The top row in a table is a special row and is often called the “header row.” It is always the top row in a table and it displays the names of the fields for which you are collecting data. After creating the header row, you can then define it as a “table” in Excel to enable the table management features. To do this, select the cells within the header row. Then click the “Table” button in the “Tables” button group on the “Insert” tab of the Ribbon. In the “Create Table” dialog box that appears, the reference to the selected cells appears in the “Where is the data for your table:” field. Check the “My table has headers” checkbox and then click the “OK” button. Doing this then creates the table area within the worksheet and adds a new row into which you can enter your first table record.

Another way to create a table in Excel is to create the header row of your table and then enter as many records as you want to initially record. Then click and drag over the entire table, including the header row and all the table’s records, to select it. After selecting it, click the “Format as Table” button in the “Styles” button group on the “Home” tab of the Ribbon. Then select the table style to apply from the dropdown menu that appears. At this point, the “Format As Table” dialog box then appears. The range of selected cells also appears in the “Where is the data for your table?” field. If your table has a header row at the top of the table, be sure to check the “My table has headers” checkbox. Then click the “OK” button to apply the selected style, and also define the range of cells as a table. Note that each field within the header row of a table has a drop-down button in it. These are “AutoFilters,” which you use to filter data in the table. We will look at using those in a later lesson. Also notice that the table has a different formatting than the rest of the worksheet area in Excel.

Donate to support our small business during the Corona Virus

Donate to Computer Physicians, To help our small business during the COVID-19 Corona virus, to keep us going so we can continue to help our customers. Click on the image to Donate:

Donate to Computer Physicians, LLC for help during the Corona Virus. Longmont, Colorado computer service
Support for Computer Physicians, To help our small business during the COVID-19 Corona virus, to keep us going. Click on the image above to Donate.

“Enjoy a 5% discount on parts on your next visit as a token of our appreciation. Just show us the email receipt for your donation.”

Erie Computer Repair in Erie, CO Colorado

We are glad to be your full time Computer company in Erie, CO Colorado. We have been in Erie, Colorado from 2003 to 2015. We are now close by in Longmont, CO still servicing Erie CO regularly. Call us for a appointment in Erie Colorado. Providing Computer Repair, upgrades, sales, installations, troubleshooting, networking, internet help, Virus removal, and training.